
Giving it Our Best Shot, Part Two
- Kimi BrownKawa

- Sep 16, 2022
- 5 min read
Updated: Nov 26, 2022
In September 2021, we happily got our hands wet making adobes with Isaac from Cornerstones in Chimayó. On the one hand, this gave us confidence by demystifying the process and showing us how forgiving earth building can be. On the other hand, learning that our on-site materials were not up to the task took the wind out of our sails... then winter intervened, allowing us to postpone the intimidating earth plaster task in favor of the "off-season" tasks from my last post.
One winter task did help us inch forward on the plastering job. Starting at square one, I dove back into mud tests with a vengeance, in the warm greenhouse. In addition to our local dirt and local arroyo sand, we got samples of materials from C&E, our concrete supplier: Albuquerque sand, plaster sand, and fill dirt. The C&E dirt had a decent amount of clay. I mixed various sand:dirt ratios with permutations of the three sands and two dirts, and also added some purchased Manzano clay to some of the mixes, and some beaten egg white in others. I made 8 golf balls and one plaster patch of each mix, and tracked everything on a monstrous spreadsheet.


After everything dried hard, we scratch tested the plaster patches. We ran water over one ball of each type -- some disintegrated, but the ones with C&E dirt had good integrity. I took another ball of each type and smashed it down onto a board until it broke. Some shattered on the first throw, while others took several throws and then broke cleanly.
We packed up all of our remaining samples and brought them with us to a 2-day plastering workshop at Southwest Solar Adobe in Bosque, south of Albuquerque. It was a good mix of class work and hands-on practice, and we worked with scratch coats and brown coats using a few different types of plaster. It again built our confidence in just "digging in," and was a satisfying two days with a small but engaged group of folks.


The class leader, Joe, looked our dirt samples over and thought that several of them would make a nice mix. Discussing our job, Joe, like everyone else we had spoken with, felt that we would need to have all of the voids in our lumpy tire bales packed tightly in order for the earth plaster surface to have integrity.
Back at the ranch, we wired the interior bales as we had done on the outside, with one major difference: we first stapled burlap over the surface of the bales after stuffing the holes and gaps the best we could. It seemed tighter and more robust than the exterior had. The posts sticking out between bales will provide a place to attach shelving or electrical fixtures later. The pipes provide channels through the massive walls for electrical wire, water main, wastewater, and air channels.


Still, we did not have any confidence that we could get the earth plaster in solid enough to create monolithic walls, and we knew that it would take months of hard labor plus curing time between each of the many layers that would be required. Also given that we would need to buy all or most of the earth materials for the task, it just did not seem feasible, or at least did not seem like the best solution.
So, yeah, we called on Gary, Johnson, Jonathan, and Jaythan from Sunwest Gunite again, to cover the interior walls with shotcrete. They were now working with a known quantity, since they had done the exterior tires last time.


Chip and I even got a chance to try out as nozzle man, and Gary gave us the thumbs-up! But I think we are busy enough in retirement and don't need another day job...


We knew what we were doing a little better in the cleanup department. We had things masked off appropriately, and jumped in to clean the wet shotcrete from some of the key openings and areas where we would be attaching other structures before it had time to harden.
We were also better prepared for the cleanout of the equipment, which had caught us by surprise the previous time. Shotcrete equipment requires much more water for cleanout than cement trucks do, and on our uneven land that can be a problem.
This time Gary brought some lined boxes to capture the washout, and Chip and I had scrap cardboard and wood to dam up any overflow before it ran too far. The boxed cleanout water evaporated over the next week, and left solid chunks of material that are easy to dispose of. A decent solution, which we highly recommend!
So once again, with shotcrete we were able to finish in one day what would have otherwise taken us months. It took me a while to come around to the approach, but it seemed like the sensible solution, and we feel good about it!
We will be able to finish the walls with a thinner layer of earthen plaster as time goes on, but if push comes to shove we would be able to get an occupancy permit even if the walls are still in their raw shotcrete state when we move in. We have tried patches of our best lime and clay plasters on the back exterior wall, which will eventually be covered by an earth berm. They look solid!


We had one more surprise concrete job come up when our inspector said we needed concrete stem walls for the bearing walls that will hold up our loft. Another delay, but all good -- we want the loft to be well-supported too, after all! So I got busy on the plumbing to make sure we knew just where it would come through the stem wall, and Chip got busy designing and building forms. Never mind that my waste stack used san tees inappropriately; I was still blissfully ignorant when the pic was taken!


Bringing out another (hopefully the last) concrete truck meant that we might as well fill our porch post holes to do at the same time, and we rough prepped a pad outside our greenhouse in case there was any cement left over.


The mixer's chute came right through the empty door frame into our living room and filled our cart with cement that Chip and I wheeled over and shoveled into the forms, reminiscent of our first job pouring the post holes for our greenhouse frame and retaining walls pre-COVID years ago.


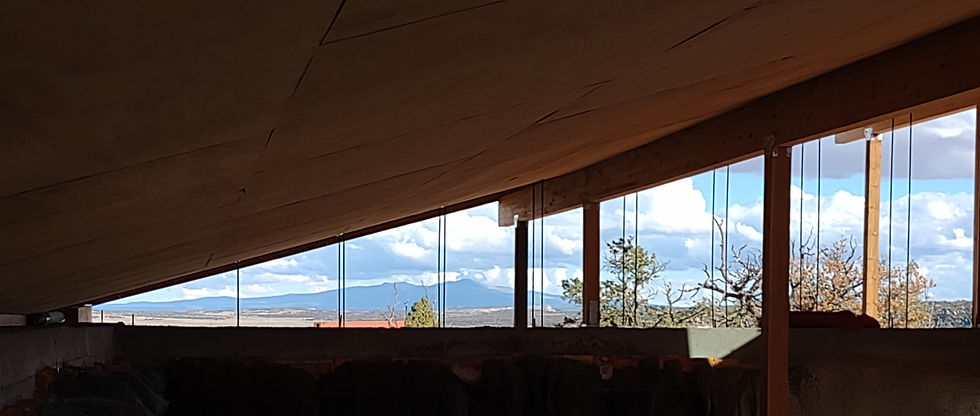
Ahh... So now with our last concrete coming through the front opening, we took the plunge... Chip and I hefted those four big glass sliders from the trailer where they had been sitting for over a year, and installed them in Chip's frame.

At last, we are closed up for winter.
...winter of 2022/2023, that is!
(And no, that doesn't mean we have a house yet, and we don't plant to move in to our construction site!)


Classy little "cabin". Thanks for the interesting details. xo